How to make a figure with your own hands?
Every year, various thematic decor becomes more and more popular. In this case, we are talking about numbers. They can be seen not only at children's birthdays, but also at photo shoots or even weddings. They look very beautiful, especially in photographs. If you like such products, then we propose to make several options with your own hands.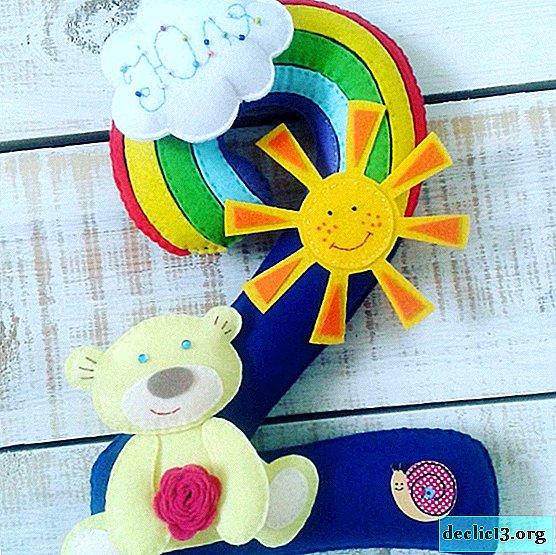


How to make a number from napkins?
Perhaps one of the easiest options are numbers from napkins.
For work, we need such materials:
- cardboard or box;
- several packs of napkins;
- scissors;
- holographic sheet of cardboard;
- stapler;
- Scotch;
- glue moment.

We cut one napkin into four parts of the same size.

We connect two quarters with the help of a stapler. We repeat the same with the rest. 
We cut the corners on each workpiece, forming a circle.

Carefully lift the first layer of tissue and squeeze it with your fingers. Do the same with each layer.


We straighten the petals a little and the result is a flower, as shown in the photo.

We make the necessary number of blanks on the same principle.

From white napkins we make the same blanks. In this case, they are slightly larger in size, so we crop them so that they become the same as red.


The result is quite a lot of colors. But absolutely all of them will be needed further.

On a sheet of cardboard or box draw a number. It is very important that it be proportional and have the correct shape.

Cut the number in duplicate. From the remaining cardboard we cut strips of the same width. They will be needed to form the side parts.

Glue the strips to one digit with adhesive tape.

Only after that we fix the second digit on the cardboard blank.

We glue the flowers on a cardboard frame with glue.

This must be done carefully so as not to crumple the flowers.


You can also make additional decor figures in the form of a crown. To do this, print a stencil on a piece of paper or draw it. Cut the blank and circle it on holographic cardboard.

We cut out the crown in duplicate and glue the parts together. 
Glue the crown to the flowers with glue. Beautiful, stylish decor in the form of numbers is ready!

In fact, napkins are almost always used to create numbers. This is not surprising, because it is they that make them more magnificent.


Volumetric figure: DIY manufacturing secrets

Necessary materials:
- cardboard;
- small wooden blocks;
- Scotch;
- corrugated paper or napkins;
- pencil;
- scissors;
- ruler;
- stationery knife;
- twine;
- glue gun.

On a sheet of cardboard we draw a number. Choose dimensions individually or use the ones marked on the photo.

Cut the workpiece in duplicate. Also cut out strips of the same width to form the sides of the numbers. Glue the strip to one of the blanks using tape. Inside we place wooden bars in the places that are marked in the photo. If desired, attach a piece of twine so that you can hang the decor on the wall.

Using a hot gun, fix the second digit pattern.

Cut strips of corrugated paper of small width.

Glue each strip to the joints with a glue gun.

We make a fairly large number of square blanks from corrugated paper.

We wrap the paper blank around the pencil, apply glue to it and fix it on a cardboard frame.

Please note that the blanks must be glued fairly tightly to each other.

For the lower part of the numbers and legs you will need smaller blanks.


From the cardboard we cut out the base for the leg of the figure and glue several bars for weighting on it.

We connect the parts together and decorate the rest of the leg with paper decor.

On the back of the numbers we glue the corrugated paper.

The result is a stunningly beautiful volumetric figure that will delight every child.

DIY cardboard figure
Fans of laconic decor will definitely appreciate this version of the figures from cardboard.

Prepare the following:
- thick cardboard;
- pencil;
- ruler;
- paints;
- scissors;
- brush;
- sheets of paper;
- compass;
- yellow corrugated paper;
- glue;
- additional decor.
On a sheet of cardboard we draw a number and cut it out. We paint in a suitable shade and leave to dry completely. On a piece of paper we make circles of not large size with a compass. Cut them and fold them four to five times. Trim the top as shown in the photo.

We unfold the blank and repeat the same with the rest.

From corrugated yellow paper cut a strip. Cut the edges along the bottom edge, as in the photo. It turns out a kind of fringe. Turn it tightly into a circle and fix the tip with glue.

We glue together two white blanks and in the middle we attach the yellow part.

We lay out paper flowers in a chaotic manner, and then glue them to the number.

The result is a cute accessory for the holiday.

Also, cardboard, you can make other, no less original versions of the numbers.


Corrugated Paper Number
Corrugated paper products always look especially beautiful. They are often chosen for thematic photo shoots. Therefore, if you like this option, then feel free to follow the step-by-step master class.
In the process you will need the following:
- corrugated paper;
- scissors;
- centimeter;
- gum;
- cardboard;
- glue;
- pencil;
- glue gun.

From corrugated paper we cut out strips of the same size.

Turn the edge a little on one side of the workpiece.

As a result, the blank should look like in the photo.

We begin to form the middle of the rose.

We wrap the entire strip around the middle and fix the finished rose with an elastic band or wire.

We make the necessary number of roses.

On a sheet of cardboard we draw a number and cut it out. We glue the corrugated paper in a suitable color. We fix the roses with a glue gun.

Decorative number: the most original ideas
Everyone can make a volume figure with their own hands. To do this, you do not need too expensive materials. After all, if you wish, you can even use the means at hand. Show your imagination, be inspired by ideas and then you will definitely get beautiful decor.


